Watch the Configuring Interactive Player Actions video
Total running time: 6:23
Overview
Storyboards can include instructions that allow the Idomoo player to perform specific actions. These actions might include presenting chapters or triggering player events, such as pausing the video to ask a question. Actions can also be linked to follow-on actions, enabling an unlimited level of interactivity.
This article explains how to configure interactive player actions in your videos. A reference table below outlines each action and its function.
Adding Menu Bar Chapters
Any scene in your library can be used as a chapter marker. Once marked, it appears in the Idomoo Player during playback, allowing the viewer to click and jump directly to that scene.
In the example below, each scene is labeled Chapter 1, Chapter 2, and Chapter 3. However, you can use any name to create intuitive navigation.

To define a chapter marker, follow these steps:
- Open a storyboard and select a scene. Its properties will appear on the right.
- By default, the scene name is used as the chapter label, but you can edit it under Scene Name.
- Tick Use For Player Navigation to mark this scene as a chapter.
Adding Player Events and Actions
In addition to chapters, you can enrich your videos with player events and actions for deeper interactivity.
Below is an overview of how Player Events and Player Actions work.
Creating Player Events
Player events fall into two main categories:
- Timeline Events: Triggered at specific timestamps during video playback.
- Interactive Placeholders: Triggered when viewers interact with predefined placeholder (e.g., click zones).
Timeline events are added directly in Storybuilder while Interactive placeholders require placeholder layers. All viewer interactions—regardless of event type—are tracked in analytics.
Creating Player Actions
Each event results in one or more Player Actions. These actions are logged in analytics, offering insight into how users engage with your video.
The table below lists each action type, its function, and whether it supports the Add Parameter option.
Player Actions Overview
| Action Name | Function | Additional Information | Available ‘Add Parameter’ |
|---|---|---|---|
| Jump To | Skips to the start of a specific scene | Supports an offset if you want to start mid-scene | |
| Open Link | Opens a new browser tab with the provided URL | √ | |
| Load Video | Loads a different video into the same player | Add the video URL below this setting | √ |
| Continue | Continues playback and reports analytics | ||
| Checkpoint | Continues playback and reports a checkpoint to the Checkpoints graph | Use to track if viewers watched specific moments | |
| End of Video | Skips to the final frame of the video | ||
| Pause | Pauses video playback | ||
| Trigger Event | Fires a JavaScript event on the landing page | √ | |
| Invoke API | Sends an API call without interrupting playback | √ | |
| Show Dialog | Opens a custom dialog (see dialog creator) | ||
| Set Player Parameter | Sets a parameter usable in future actions | Lasts until the player is closed or refreshed | √ |
How to Add a Player Action Timeline Event
Open the desired scene and click Add Player Action. Then click the settings icon on the new tile to open the Player Action panel.

- Name the event for easy tracking in analytics.
- Enter the time (in seconds) for the action to trigger, based on the scene's timeline.
- Select an action type (see table above).
- Name the action, either individually or grouped using a shared name.

Adding an Additional Action
You can add follow-on actions using the Additional Actions button. Choose whether the follow-on occurs Always or If specific conditions are met.
Name each additional action to track it separately in analytics.

Note: There is no limit to the number of additional actions you can configure.
How to Add Interactivity to a Placeholder
Interactive placeholders must be added early in production using After Effects. These define where clickable areas will appear on screen.
Once placeholders exist, use the following steps to configure them:
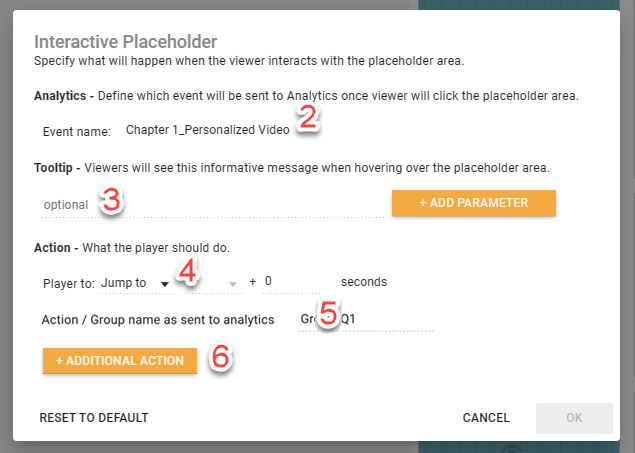
Select the scene and hover over the placeholder area. Click the hand icon to open the Interactive Placeholder panel.

- Add a name in the Event Name field for analytics tracking.
- (Optional) Add a tooltip to explain the button's purpose. This displays on hover.
- Choose the desired action when clicked.
- Name the action or group it by shared name for analytics.
- Add any Additional Actions if needed.
Example: How to Use Interactive Placeholders for Surveys
In this example, the viewer sees two buttons at the end of a video. One button means "I liked it", the other means "I disliked it".

To configure the buttons:
- Open the storyboard and locate the scene.
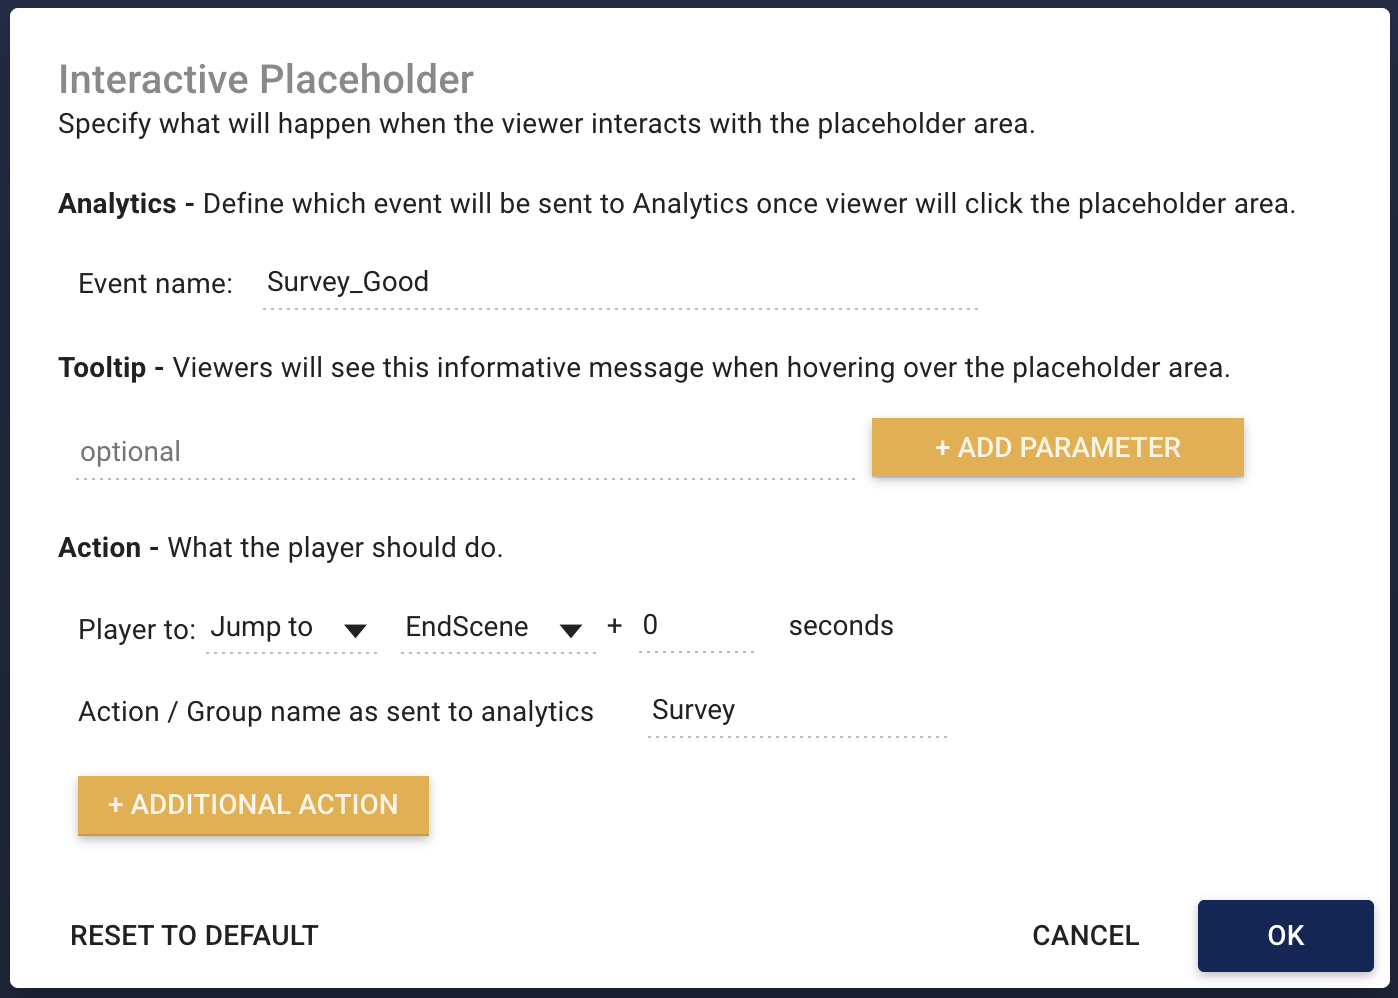
Click the hand icon on the left button placeholder.

- In Event Name, enter
Survey_Good. - (Optional) Add a tooltip like “Click here if you liked this video.”
- Set the action to jump to the final scene.
- Use
Surveyas the action name for grouping. - Click OK.
- Repeat for the right button, using
Survey_Badas the event name.
Add a Fallback Timeline Event
If the viewer doesn’t click either button, the video should pause after a set time. To implement this:
- Click +ADD PLAYER ACTION.
- Open the Player Action panel.
- Set Event Name to
Survey_Pause. - Set the time to 8 seconds.
- Set the action to Pause.
- Use
ungroupedas the action name.
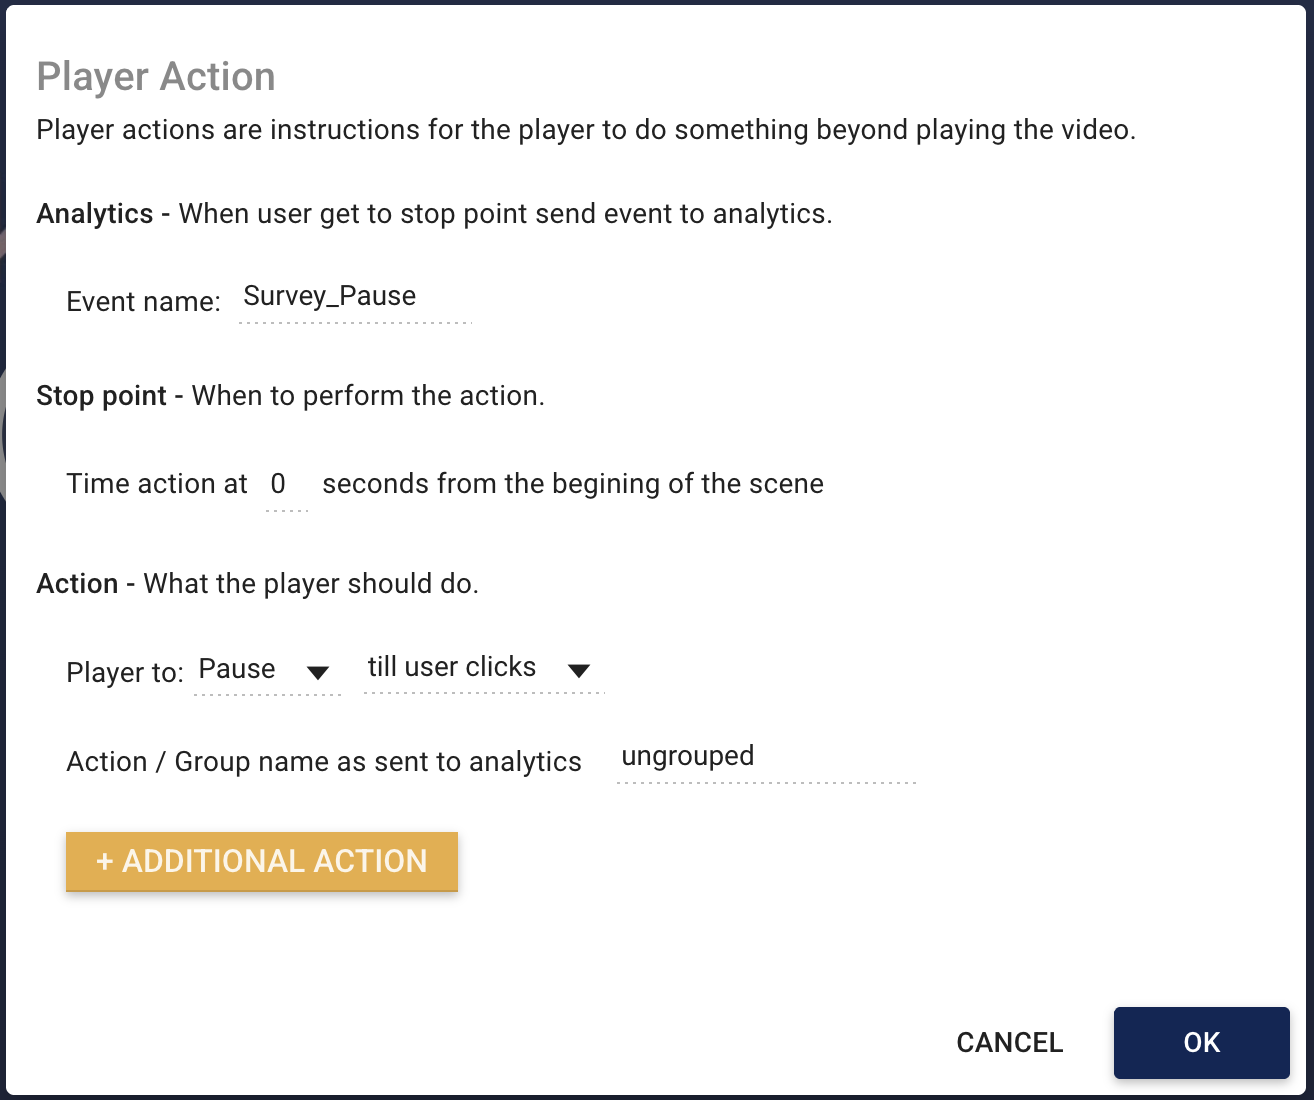
This creates a failsafe: If no buttons are clicked after 8 seconds, the video pauses until a button is clicked. Then, playback proceeds to the final scene.
Analytics records:
Survey_GoodSurvey_Bad— both under theSurveygroupSurvey_Pause— underungrouped
This provides insight into how many users engage and how many require nudging.
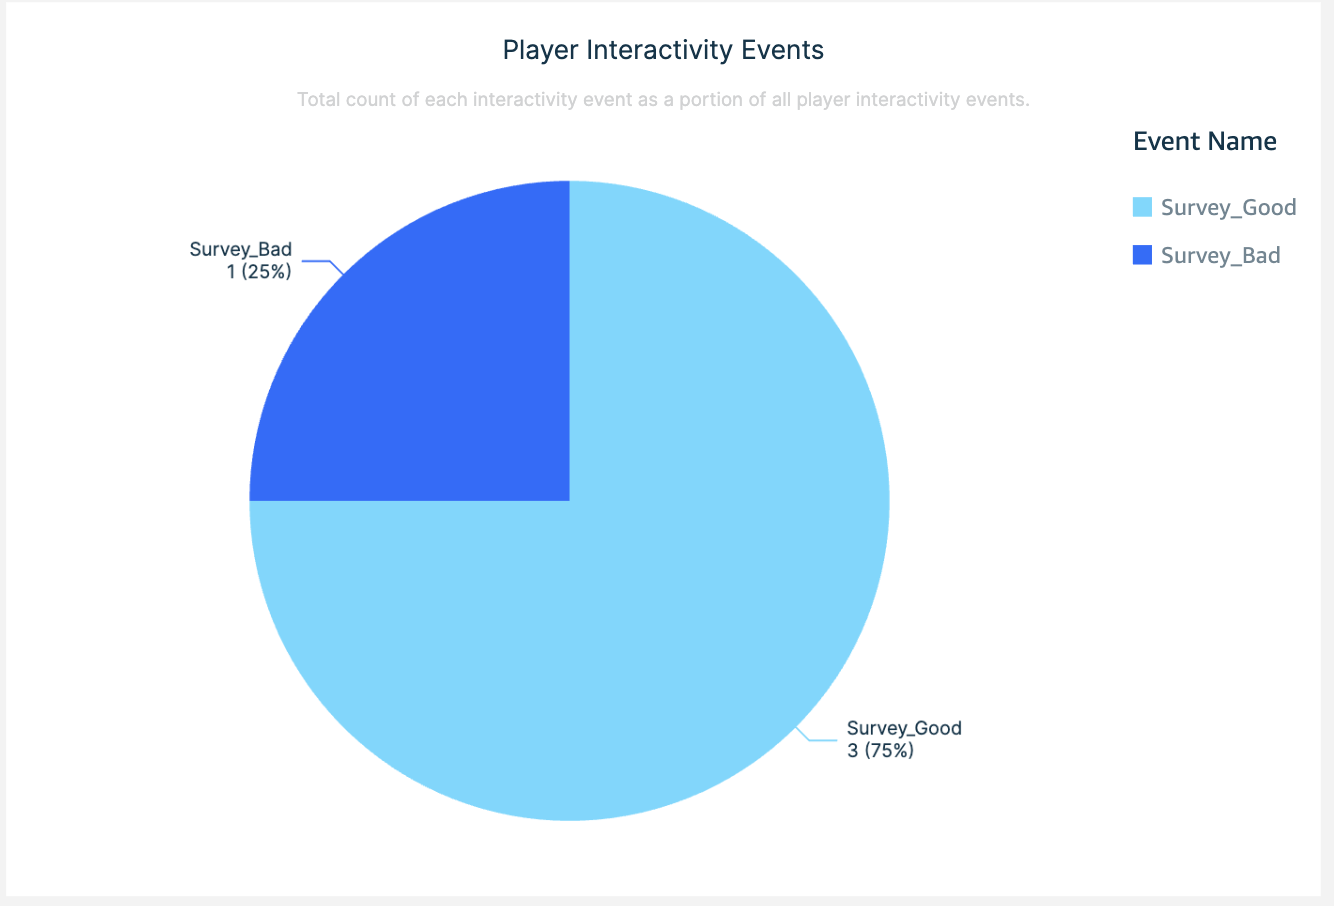
In the analytics dashboard, using the Interactive Group drop-down, I can filter to just see the Survey group.
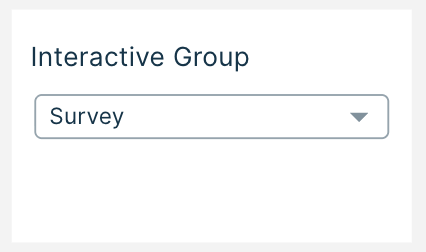
And looking at the Player Interactivity Events pie chart, I can clearly see that 75% thought the video was good! Happy days.
For more information about what is available for analysis in the aalytics dashboard, read the Analytics Dashboard – Interactivity article in the academy.